HR & people · Power BI template
HR Headcount & Attrition Power BI template
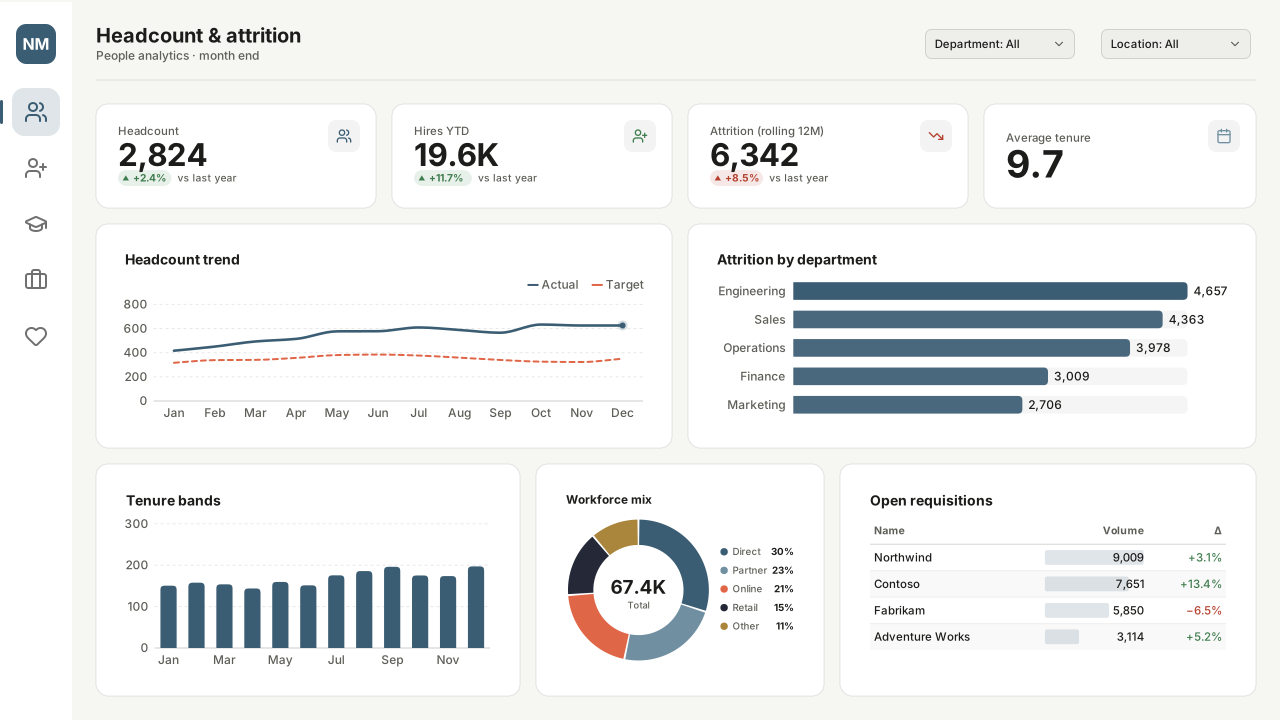
Power BI HR dashboard template: headcount, hires, attrition and tenure KPIs, headcount trend, attrition by department, workforce mix and open requisitions.
By Nawaf Sharaf · Founder & Reliability Engineer · Updated
Free for commercial useDark version: same layout, colours re-solved and checked for WCAG AA contrast.
BetaOpens in Power BI Desktop with 6 tables of sample data and every visual bound. See what’s inside
Free, no sign-up. The PBIP with sample data includes the background, theme and a README. 1920×1080 fits a new page in a Fluent 2 report; 1280×720 and 2× fit Classic pages. Downloads carry a small “Made with VizForge” mark (sign in to the studio to remove it).
- Layout
- Left nav rail, 4 KPIs, two trend panels, three-panel workforce row
- Page size
- 1280×720 px (16:9, Power BI default)
- Theme
- Nordic Minimal
Open the sample-data PBIP in Power BI Desktop
Checked against Microsoft Learn's Power BI Desktop projects documentation (as of Nov 2026).
- 1
Unzip to a short path and open the .pbip
Extract the zip to a short local folder such as C:\PBI (Windows limits project paths to 260 characters, and Desktop can't save a project straight to OneDrive or SharePoint), then double-click the .pbip file or use File → Open in Power BI Desktop. Microsoft still lists projects and TMDL as preview features (as of Nov 2026): if Desktop won't open the project, go to File → Options and settings → Options → Preview features, tick “Power BI Project (.pbip) save option” and “Store semantic model using TMDL format”, then restart Desktop.
- 2
Select Refresh once
The project ships without the local data cache (.pbi/cache.abf), so Desktop opens the full model definition without data. Select Home → Refresh: every table is built from values written into its Power Query step, so there is no data source to sign in to.
- 3
Save as .pbix or connect your data
Use File → Save as to keep a single .pbix file, or open Transform data and replace each table's Source step with your own query, keeping the column names so the measures and visuals keep working.
What’s inside the HR sample model
Rendered from the same definition the download writes as TMDL, so this list always matches the file.
A 300-person UK and Ireland company: 340 employee records with hire and leave dates back to 2019, so headcount, hires and rolling attrition can be computed for any month, plus 26 open requisitions. Employee IDs are synthetic; there are no names. Units: People; tenure in years; the data snapshot date is 31 Oct 2026.
Tables and columns
Calendar
Date table · 2019–2026, one row per dayDate table generated in Power Query (List.Dates), marked as the model's date table.
- Date (date)
- Year (whole number)
- Quarter (text)
- Month (text)
- Month Name (text)
- Week Start (date)
- Weekday (text)
- Fiscal Year (text)
Department
Dimension · 7 rowsDepartments.
- Department (text)
Location
Dimension · 4 rowsOffice locations.
- Location (text)
- Country (text)
Tenure Band
Dimension · 4 rowsService-length bands (tenure at 31 Oct 2026, or at leaving).
- Tenure Band (text)
Employees
Fact · 340 rowsOne row per employment. Leave Date is blank for current employees. Hire Date and Leave Date are related to the calendar inactively; the measures choose the date they need.
- Employee ID (text)
- Department (text)
- Location (text)
- Employment Type (text)
- Hire Date (date)
- Leave Date (date)
- Tenure Band (text)
Requisitions
Fact · 26 rowsOpen job requisitions.
- Requisition (text)
- Job Title (text)
- Department (text)
- Location (text)
- Opened Date (date)
- Stage (text)
- Days Open (whole number)
Relationships
Many-to-one, single direction. Inactive relationships are switched on inside a measure with USERELATIONSHIP.
- Employees[Hire Date] → 'Calendar'[Date](inactive)
- Employees[Leave Date] → 'Calendar'[Date](inactive)
- Employees[Department] → Department[Department]
- Employees[Location] → Location[Location]
- Employees[Tenure Band] → 'Tenure Band'[Tenure Band]
- Requisitions[Department] → Department[Department]
- Requisitions[Location] → Location[Location]
DAX measures
All measures live in a dedicated Key Measures table. Copy any of them into your own model; rename the table and column references to match.
Data As OfThe sample's snapshot date. On live data, replace with TODAY () or the last load date.
Data As Of =
DATE ( 2026, 10, 31 )
Format string: d mmm yyyy
As Of DateEnd of the selected period, capped at the snapshot date.
As Of Date =
MIN ( MAX ( 'Calendar'[Date] ), [Data As Of] )
Format string: d mmm yyyy
HeadcountPeople employed at the end of the period. Blank for periods after the snapshot date.
Headcount =
VAR AsOf = [As Of Date]
RETURN
    IF (
        MIN ( 'Calendar'[Date] ) <= [Data As Of],
        CALCULATE (
            COUNTROWS ( Employees ),
            Employees[Hire Date] <= AsOf,
            OR ( ISBLANK ( Employees[Leave Date] ), Employees[Leave Date] > AsOf )
        )
    )
Format string: #,0
Hires YTDHires in the calendar year to date.
Hires YTD =
VAR AsOf = [As Of Date]
RETURN
    CALCULATE (
        COUNTROWS ( Employees ),
        REMOVEFILTERS ( 'Calendar' ),
        Employees[Hire Date] >= DATE ( YEAR ( AsOf ), 1, 1 ),
        Employees[Hire Date] <= AsOf
    )
Format string: #,0
Leavers 12MLeavers in the 12 months to the end of the period.
Leavers 12M =
VAR AsOf = [As Of Date]
RETURN
    CALCULATE (
        COUNTROWS ( Employees ),
        REMOVEFILTERS ( 'Calendar' ),
        Employees[Leave Date] > EDATE ( AsOf, -12 ),
        Employees[Leave Date] <= AsOf
    )
Format string: #,0
Attrition Rolling 12MLeavers over the average of opening and closing headcount, trailing 12 months.
Attrition Rolling 12M =
VAR AsOf = [As Of Date]
VAR Start = EDATE ( AsOf, -12 )
VAR HeadcountStart =
    CALCULATE (
        COUNTROWS ( Employees ),
        REMOVEFILTERS ( 'Calendar' ),
        Employees[Hire Date] <= Start,
        OR ( ISBLANK ( Employees[Leave Date] ), Employees[Leave Date] > Start )
    )
RETURN
    DIVIDE ( [Leavers 12M], ( HeadcountStart + [Headcount] ) / 2 )
Format string: 0.0%
Average Tenure (years)Mean service of people employed at the end of the period.
Average Tenure (years) =
VAR AsOf = [As Of Date]
RETURN
    AVERAGEX (
        FILTER (
            Employees,
            Employees[Hire Date] <= AsOf
                && ( ISBLANK ( Employees[Leave Date] ) || Employees[Leave Date] > AsOf )
        ),
        DATEDIFF ( Employees[Hire Date], AsOf, DAY ) / 365.25
    )
Format string: 0.0
Open RequisitionsRoles being recruited.
Open Requisitions =
COUNTROWS ( Requisitions )
Format string: #,0
Avg Days OpenMean age of open requisitions.
Avg Days Open =
AVERAGE ( Requisitions[Days Open] )
Format string: #,0
What each visual is bound to
The PBIP opens with these fields already on each visual.
| Visual | Type | Fields |
|---|---|---|
| DepartmentSlicer | Slicer | Department[Department] |
| LocationSlicer | Slicer | Location[Location] |
| HeadcountCard | Card | [Headcount] |
| Hires YTDCard | Card | [Hires YTD] |
| Attrition (rolling 12M)Card | Card | [Attrition Rolling 12M] |
| Average tenureCard | Card | [Average Tenure (years)] |
| Headcount trendLine chart | Line chart | Calendar[Month], [Headcount] |
| Attrition by departmentBar chart | Bar chart | Department[Department], [Attrition Rolling 12M] |
| Tenure bandsColumn chart | Column chart | 'Tenure Band'[Tenure Band], [Headcount] |
| Workforce mixDonut chart | Donut chart | Employees[Employment Type], [Headcount] |
| Open requisitionsTable | Table | Requisitions[Requisition], Requisitions[Job Title], Requisitions[Department], Requisitions[Stage], [Avg Days Open] |
Questions this dashboard answers
Each one is answered by a visual on the page, from the sample model's own tables and measures.
- How is headcount changing, and how many people joined this year?
- What is rolling 12-month attrition by department?
- How is tenure distributed across the workforce?
- What does the workforce mix look like by location and department?
About this dashboard layout
People reports are read by HR business partners and by department heads, and the second group is not used to HR jargon. The KPI row sticks to four plain measures: headcount at the end of the period, hires year to date, rolling 12-month attrition rate and average tenure. Rolling attrition avoids the seasonal noise of a monthly rate.
The headcount trend (line, month-end headcount with hires and leavers available in the tooltip) and attrition by department (bars, sorted, with the company average as a constant line) form the middle row. A department well above the line is the conversation for the next leadership meeting.
The bottom row describes the workforce: tenure bands as columns, a gender or employment-type split as a donut, and open requisitions as a table with days open. Use bands rather than individual ages or tenures; banded data is easier to read and safer to share.
Apply row-level security by department and set a minimum group size (for example, hide any breakdown with fewer than five people) so individual leavers can't be identified. Nordic Minimal's restrained palette suits the sensitivity of the subject.
Visuals on the page
Positions are Power BI page pixels. Enter them in Format → General → Properties → Size and position, or use the PBIP download where they are already set.
| Visual | Type | X | Y | Width | Height |
|---|---|---|---|---|---|
| Department | Slicer | 920 | 24 | 160 | 40 |
| Location | Slicer | 1096 | 24 | 160 | 40 |
| Headcount | Card | 112 | 120 | 208 | 72 |
| Hires YTD | Card | 408 | 120 | 208 | 72 |
| Attrition (rolling 12M) | Card | 704 | 120 | 208 | 72 |
| Average tenure | Card | 1000 | 120 | 200 | 72 |
| Headcount trend | Line chart | 112 | 240 | 544 | 192 |
| Attrition by department | Bar chart | 704 | 240 | 536 | 192 |
| Tenure bands | Column chart | 112 | 480 | 392 | 200 |
| Workforce mix | Donut chart | 552 | 480 | 256 | 200 |
| Open requisitions | Table | 856 | 480 | 384 | 200 |
Custom visuals for this layout
Built-in Power BI visuals cover most slots above. These slots also suit a custom visual; each page covers the data shape, DAX and a prompt to generate it as a .pbiviz.
Already have a report?
Brand Makeover tries HR Headcount & Attrition first on every page of your Power BI project (.pbip zip) where it fits: the page's visuals have to go into its 9 data slots without overlaps. Pages it can't seat get another catalog layout or a brand grid. Queries, filters and bookmarks are left as they are. Free, in your browser.
Opens with the Analyst / Dense preset, because the Executive preset doesn't use this layout (9 data slots; this preset uses templates with at most 7).
Restyle my report into thisSwap a slot for a custom visual
Pick any slot and VizForge AI writes a custom visual (.pbiviz, with TypeScript source) sized to it, in this template's colours and shaped for the fields it is bound to.
Generate one that fits this layout.
Card · 208×72 px · bound to [Headcount]
1, 2 or 5 credits depending on the brief · 5 free on signup. Sign in or create a free account on the next screen; the brief is saved for 30 minutes.
A Power BI card visual titled "Headcount". It sits in a 208×72 px slot on a designed report page. Match the report's brand: data colours #3B5D73, #708FA1, #E06648, #242837, #AA863C, #6F8B4C; background #FFFFFF; text #1C1C1A; font Segoe UI. Transparent visual background so the page design shows through; no visual border. In the sample model it is bound to [Headcount]; keep the same data roles so the fields drop straight in.
Not sure what to build? Browse the visual catalog or open the template in the design studio and hand off any slot from there. Or start in the AI generator with a blank brief.
Colours and theme
Scandinavian-neutral Power BI theme: off-white page, warm grey text, a muted steel-blue lead colour and earthy comparison colours for calm operational reports.
Use the background in an existing report
Prefer to keep your own report? Apply the design to it instead of opening the PBIP.
- 1
Download the background
Take the 1920×1080 PNG for a new page in a Fluent 2 report (the default size for new pages), or the 2× PNG (2560×1440) for sharp text on a 1280×720 Classic page. Power BI scales the image to the canvas.
- 2
Set the canvas background
Format page → Canvas background → Browse. Set Image fit to Fill and transparency to 0%.
- 3
Import the theme
Design ribbon → Import theme (in the Power BI service: View → Theme pane), then pick the downloaded JSON. Data colours and fonts now match the design. Older Desktop builds: View → Themes → Browse for themes.
- 4
Place your visuals
Size each visual to the positions above with background and border off, or open the PBIP project where they are already placed.
Questions about this template
Does the HR Headcount & Attrition template come with sample data?
Yes. The “PBIP with sample data” download contains a semantic model with 6 tables and 9 DAX measures, and every visual on the page is already bound to it. The sample: A 300-person UK and Ireland company: 340 employee records with hire and leave dates back to 2019, so headcount, hires and rolling attrition can be computed for any month, plus 26 open requisitions. Employee IDs are synthetic; there are no names. The data is written into each table's Power Query step, so there is no data source or sign-in.
Is it a .pbix file?
It is a Power BI project (PBIP): a folder of text files that Power BI Desktop opens like a .pbix. Open the .pbip file, select Refresh once to load the sample rows, then use File → Save as if you want a single .pbix.
What visuals are in the HR Headcount & Attrition template?
The page has 11 visual areas: 2 slicers, 4 cards, 1 line chart, 1 bar chart, 1 column chart, 1 donut chart, 1 table. Their exact positions are listed on this page so you can match them in Power BI's Format → General → Properties panel, or skip that step by downloading the PBIP project.
Which theme does the HR Headcount & Attrition template use?
It ships with the Nordic Minimal theme (light tone). Download the theme JSON here, or open the template in the design studio and switch to any other theme or your own brand colours.
Is there a dark version of the HR Headcount & Attrition template?
Yes. Switch the preview to Dark and every download (background, theme JSON and PBIP) comes in that version. The layout is identical; the page, card and text colours are re-solved for a dark page, and the accent, status and data colours keep their hues but are adjusted until text meets WCAG AA (4.5:1) and chart colours reach 3:1 against the cards.
How do I use the background image in Power BI Desktop?
Select the page, open Format page → Canvas background, choose Browse and pick the PNG, then set Image fit to Fill and transparency to 0%. Give your visuals a transparent background and no border so the designed panels show through.
Can I open the PBIP project in Power BI Desktop?
Yes. PBIR is the default report format in Power BI Desktop since September 2026, and the download is a PBIP project: unzip it and open the .pbip file, select Refresh once and the sample data loads into visuals that are already bound (the empty PBIP leaves the containers unbound for your own data). Microsoft still lists projects and TMDL as preview features (as of Nov 2026), so if Desktop won't open it, enable them under File → Options and settings → Options → Preview features.
Build guides for this dashboard
Guides to the same dashboard job: which custom visuals it needs, the DAX behind them and prompts to generate them.
Dashboard job
Best Power BI Visuals for HR AnalyticsThe best Power BI visuals for HR analytics — headcount flow, tenure distributions, DEI heatmaps, hiring…
Team
Power BI for hrHeadcount movement, attrition by tenure and the hiring funnel: people views that answer the questions leadership asks every month.
KPI cards for this layout
Headline numbers drawn by one DAX SVG measure each, for the Card visual or a table row.
Want the headline numbers to look like cards rather than plain values? Browse the KPI card gallery or build your own in the SVG measure builder.
Related templates
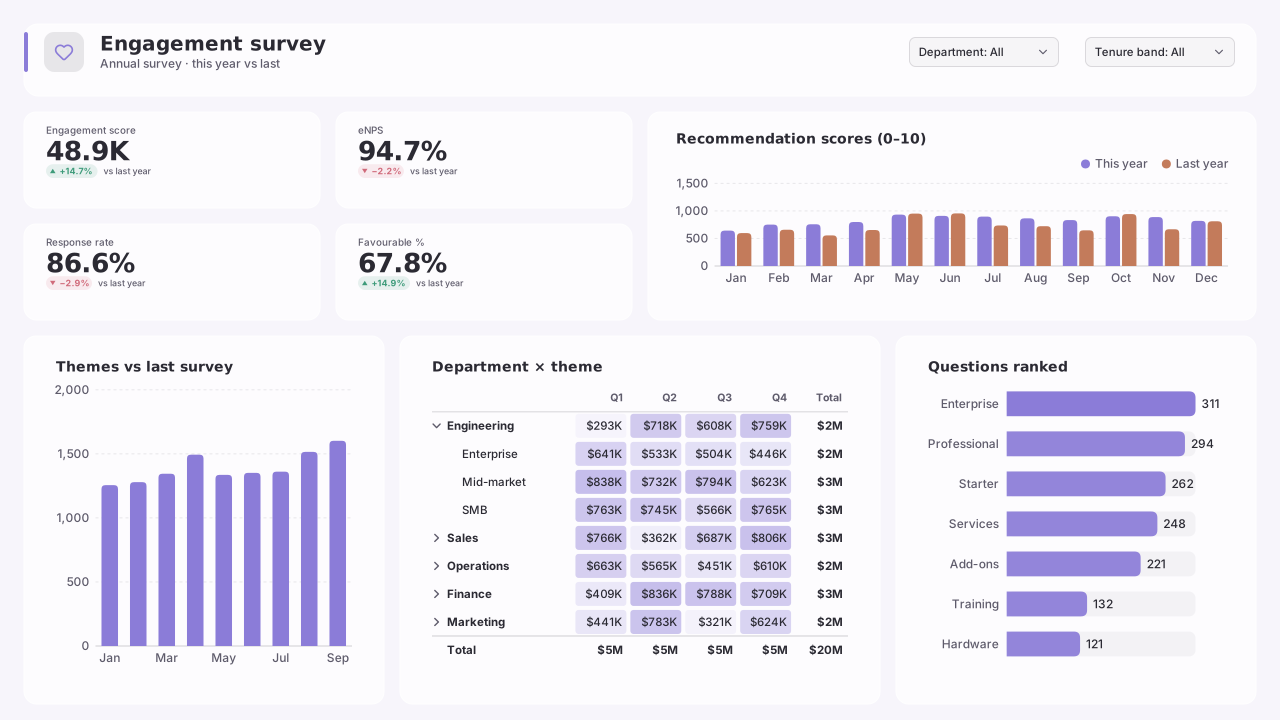
Employee Engagement Survey
HR & people
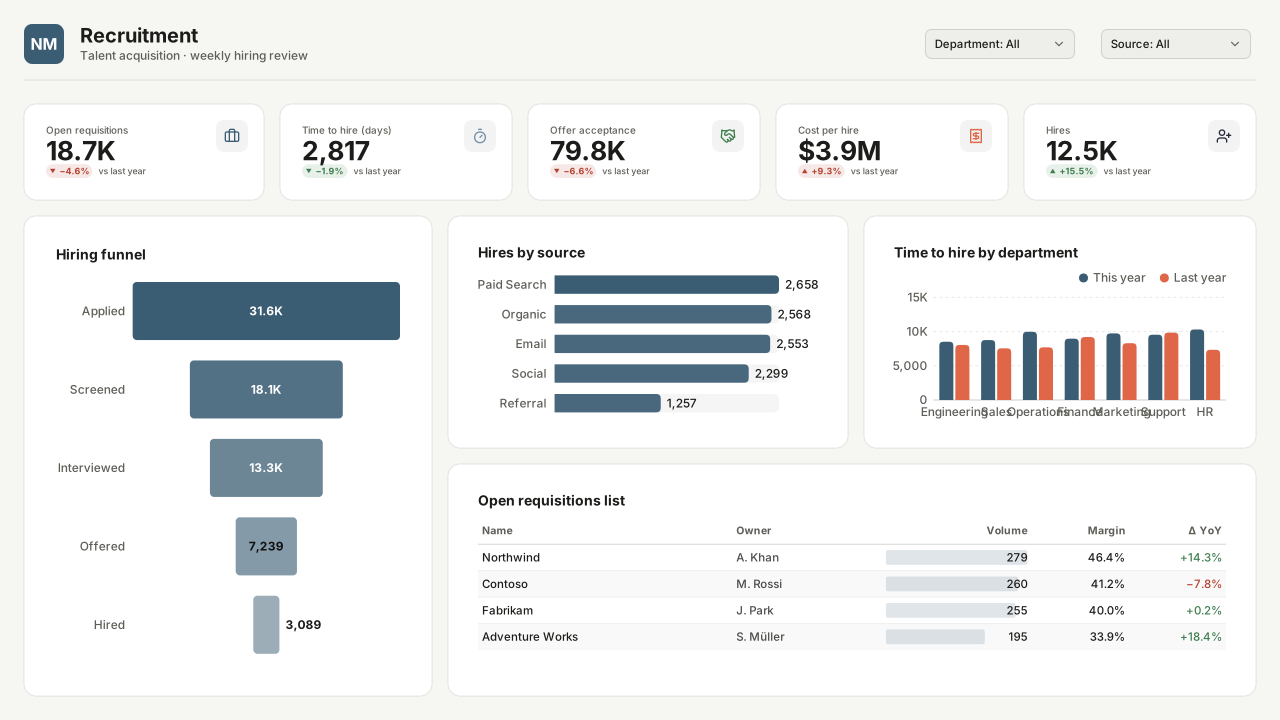
Recruitment & Hiring Funnel
HR & people
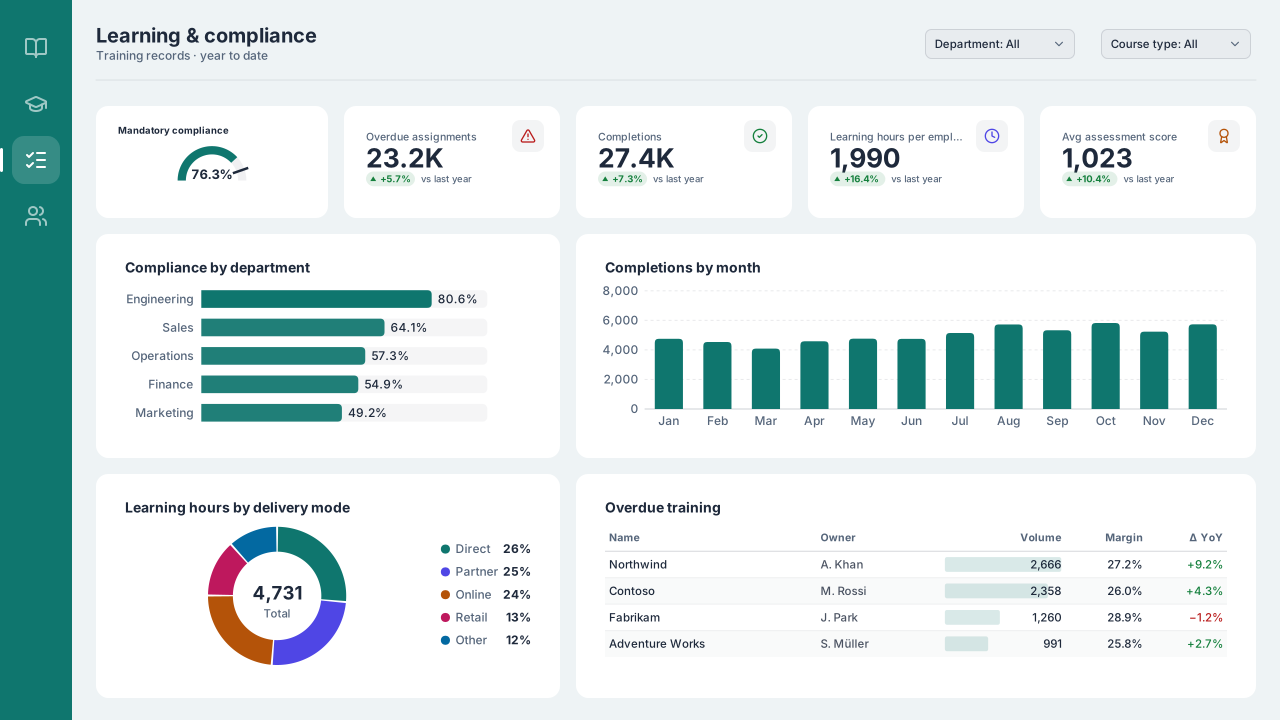
Learning & Training Compliance
HR & people
Keep exploring
61 hand-designed Power BI page layouts by department.
80 contrast-checked theme JSON files, light and dark.
Page backgrounds at 1280×720 and 1920×1080 with visual positions.
3,034 icons in 40 categories as SVG, PNG, DAX or theme icon JSON.
Make the HR Headcount & Attrition template yours
Swap in your brand colours and logo, move panels, add icons and generate missing visuals with AI, then export the background, theme JSON and PBIP project.
The design studio for Power BI. Free, in your browser, no sign-up.